 Hidden
Hidden
Hidden
Hidden
Hidden
Hidden
Hidden
FRONT PANEL OBJECTS Table Of Contents
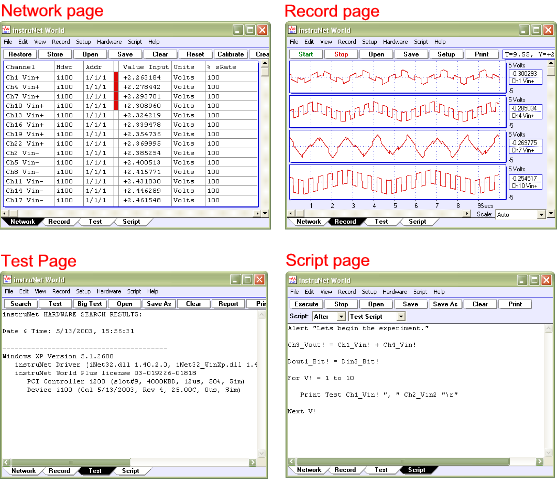
iW+ provides the ability to add front panel controls and numeric's to any page, as shown in the following picture. For a concise summary of User Defined Popups, Edit Fields, Dynamic Text, Buttons, and Pages; click here; and for details, please continue reading.
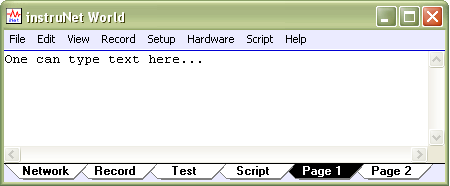
iW+ provides regions within the main window, called "pages", which are selected with a tab at the base of the instruNet World window, illustrated above. Record, Network, Test, and Script are standard pages included with instruNet. Additionally, the end user can create new pages that contain a text editor in the center of the window surrounded by buttons (which execute scripts when pressed), popup menus, text fields, and panel meters. Standard Pages
User Defined Text Editor Pages
Creating Pages Page Options 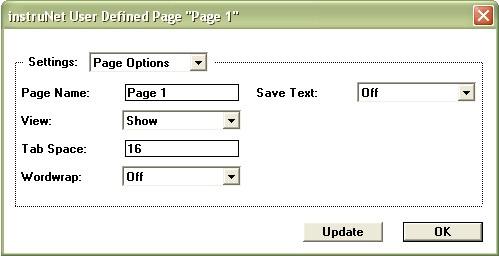
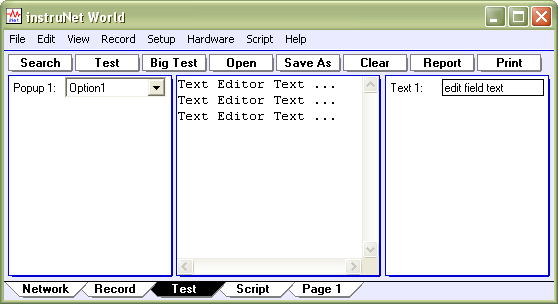
Page Name has dual uses -- it appears in the tab bar at the bottom of the window (and therefore used to select and show the page), and it is used to reference a page in script code (with spaces replaced by underscore characters "_"). For example, the Print script command prints to the currently selected page unless a page is specified as the first parameter. For example, if one creates a new page called "Data", then Print Data "abc" will print "abc" to the Data page. The following script commands all reference pages by their name: Print, Append, Copy, Execute, Digitize, Table, Show/Hide Page, Select, Clear, Erase, NewPage, NewButton, and Press. Show enables one to show or hide a page and its corresponding tab. One can adjust this field programmatically via the A HREF="scriptreference.html#show_hide_page">Show/Hide Page script command. Tab Space determines the number of characters between each tab. For example, if tab space is set to 16, then tabs are created every 16 characters at positions #17, #33, #49, etc. When printing text to pages from the script language, "\t" refers to a tab character and "\r" refers to a carriage return. These two special characters enable one to build tables. Word Wrap determines if text automatically wraps to the next line when it hits the text edit region right edge, or extends out of view. If Save Text is ON, the current text is embedded inside the .prf instrument file when one saves the setup (i.e. press Network Save button, or select Save Setup As under Setup); and restored when one loads that setup. For example, one might want to save instructions on how to use the instrument in a page called "Help", yet not save the text in a page called "Data" that is used to collect digitized data in a table. Popup Menus, Edit Fields, Dynamic Text fields, and Panel Meters are collectively known as "Panel Items". For a brief summary of each, click here. Panel Items are created by the end user and can appear on any page, and in any one of the 4 quadrants within a page (i.e. Left, Right, Top, and Bottom). Shown below is an example of one Popup in the Left quadrant and one Edit Field in the Right quadrant of the Test page.
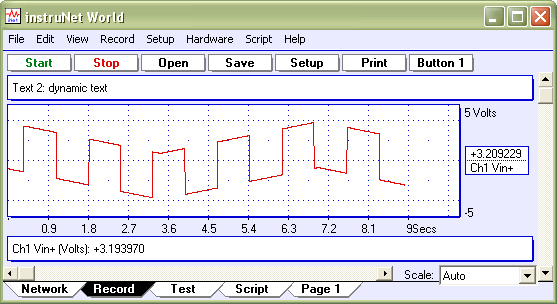
Shown below is a second example with one dynamic text field in the Top quadrant and one Panel Meter in the Bottom quadrant of the Record page.
Panel Item Position Options Position determines the quadrant, which is one of Left, Right, Top, Bottom; or Hide panel item. Page determines the page in which the panel item appears (e.g. Record, Network, Test, User Defined Pages, etc). Order is an integer between 1and 1e9 that determines the order in which panel item appears within the specified page and quadrant. Items appear in numerical order, indexed by this field, where 1 appears first. For example, if Pop1 order is 1000, Pop2 is 20, and EditField3 is 100; and these three items are in the same quadrant on the same page; they would appear in the order Pop2 (since its Order field is the lowest), EditField3, and Pop1. Creating, Editing and Deleting Panel Items
Accessing Text fields from within Scripts
Creating Text fields 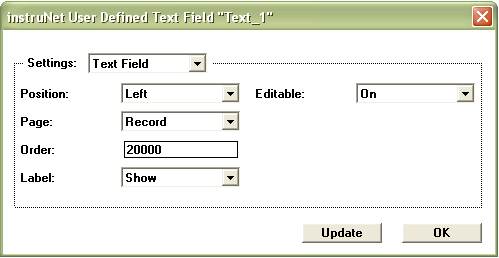
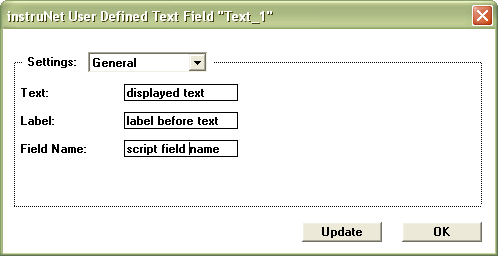
After adjusting the position options, select General in the Settings popup to view the Text, Name and Label fields, illustrated below.
Here, one can view and/or edit the field's displayed text (i.e. the Text field), adjust the Label that precedes the displayed text in the iW+ window, and adjust the Field Name that references the field within the script code. For an example of an instrument that uses text fields, click here.
Panel meters update at the rate set in the Script Options User Rate field (accessed by selecting Script Options in Script menu) in units of updates-per-second; and update whether or not you are digitizing. A typical rate is 2 (i.e. twice a second). Recall that User Events are similar to Control Events, except they update at all times whereas Control Events only run while digitizing (e.g. after pressing Start button in Record page). Panel Meter Calculation Panel Meter Options
Detecting a change within a Popup or Edit Field If (Pop1_last! != Pop1!) Pop1_last! = Pop1! EndIf If one wanted to execute this check periodically, whether digitizing or not, it would be placed into the User script; otherwise, to make this check only while digitizing, it would be placed into the Control script. To initialize the Pop1_last! variable, one might set it to -1 in the Before Script Engine script.
Creating, Editing & Deleting Buttons Button Options 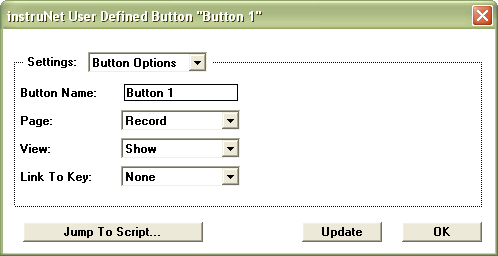
Button Name determines the button's text, as it appears inside the button rectangle. In the above illustration, for example, the right-most button is named "Button 1". Page determines which page the button appears on (e.g. Network, Record). View determines whether or not the button is shown or hidden. Link to Key optionally specifies a function key (F1 · F10), which when pressed, executes the button's script. Pressing Jump To Script opens the script editor for the button's corresponding script. Accessing a Button's Script
|
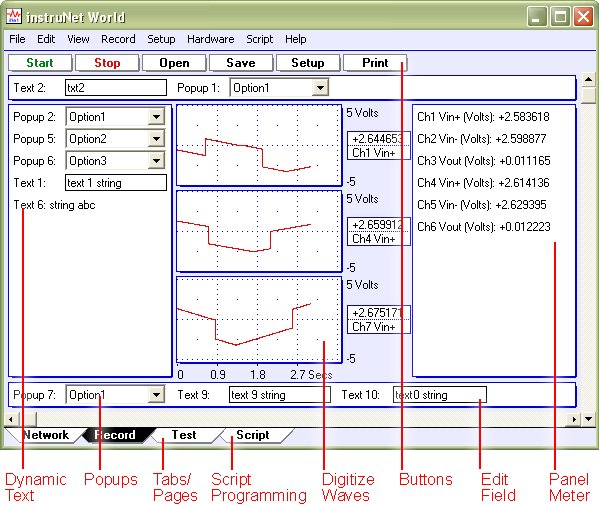
 Panel Meters, as illustrated to the right, show a channel's engineering units value, or a function of that value (e.g. "abs(value) * 10"). Each input and output channel (analog or digital) has its own Panel Meter that is hidden until turned on by the end user (i.e. Panel Meter
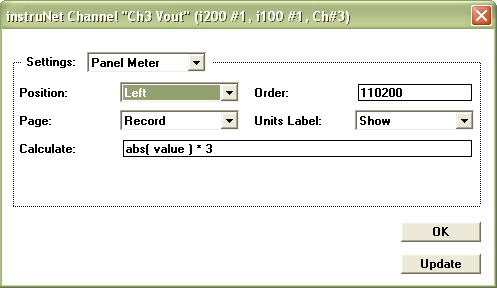
 A front panel popup menu allows one to select one of several choices in a list, as shown to the right. One line of script code reads or sets the position of the popup, where 1 refers to the upper-most item, 2 the one below it, etc. For details on accessing a Popup from script code, click
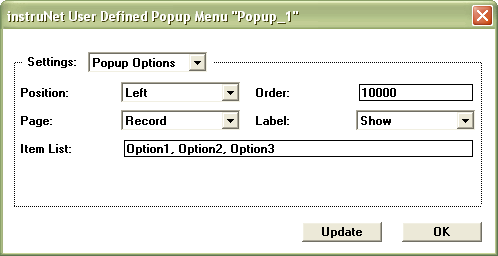
 One can easily create buttons that execute scripts when pressed. These buttons appear at the top of the window, in a specified page, in a quantity only limited by available window space. One might have room for 10 to 20 buttons per page, depending on the size of the monitor. In the above example, all buttons in the Record page have been hidden, except Start and Stop; and a new button called "Button 1" has been added. For information on how to hide any button, click